
The new printing system enables students to print in black and white on the printers located on the different campuses of the University of Vic from any Internet-connected device.
How to access the Printing Portal:
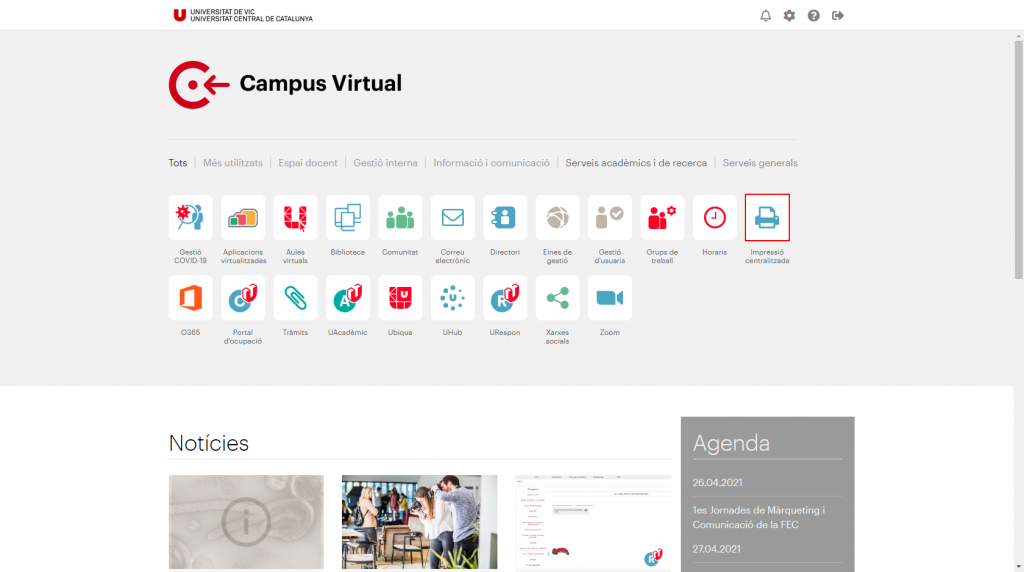
1. Access the Virtual Campus and click on the icon that you’ll find on the home page. The portal will open in a new window.
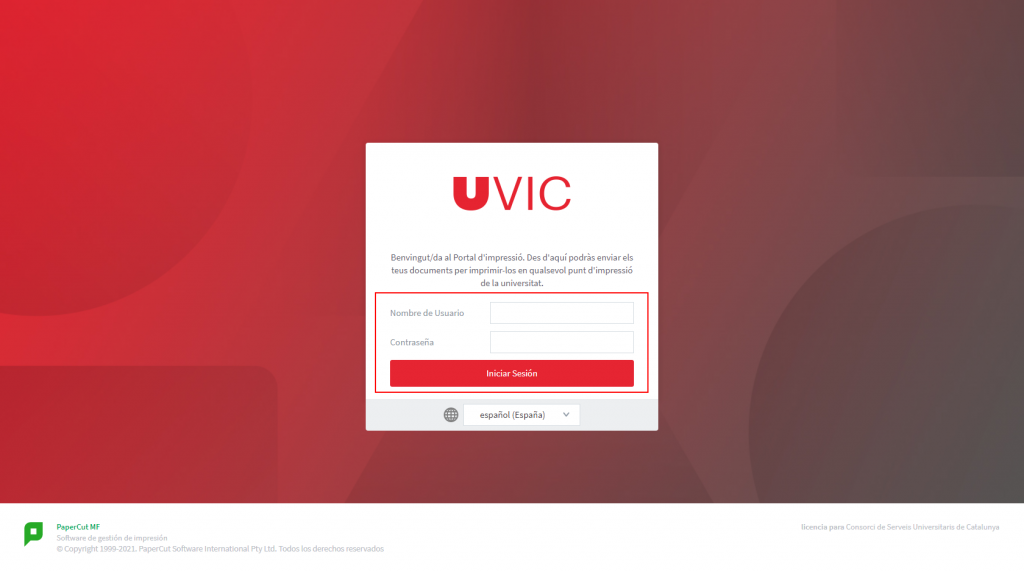
2. Enter your Campus credentials (UVIC identity number + password or email + password).
The student has four options when send documents for printing.
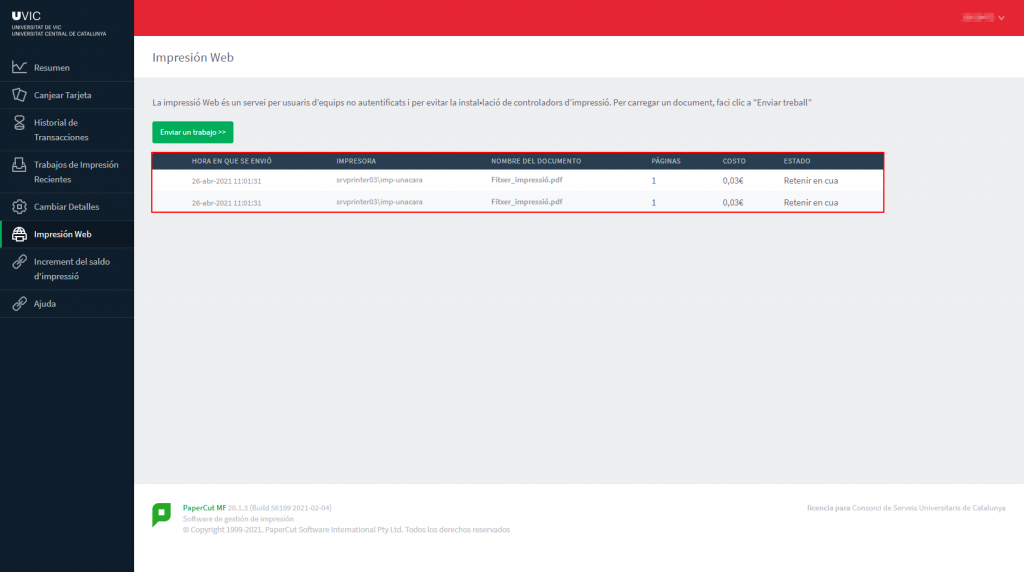
Once the documents have been sent, they stay in the print queue for 24 hours and users can release them by identifying him/herself on the printer using their username and password or the ID number as shown in the “Quick guide to the multifunction device“.
You can only print PDF files of up to 100Mb on two sides with this function.
1. Access the “Printing portal”
2. Select the option “Web printig > Send a job”

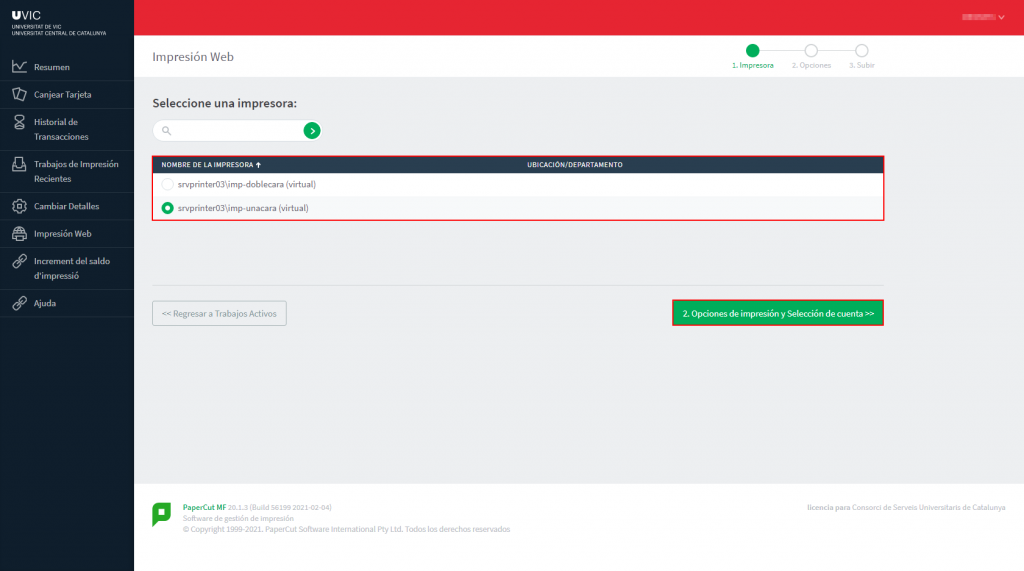
3. Select the printer and click on “Print Options and account selection”
4. Select the number of copies and click on “Upload document”

5. Drag the PDF files to the box or click on “Upload from computer” and select the PDF file. Click on “Upload and Complete”

It goes to the queue after you have sent it. You have 24 hours to pick it up from any of the printers on the UVic campus. See the “Quick guide to the multifunction device” to enable printing.
This function enables you to print PDF files (one copy) by simply sending an e-mail from your UVic’s e-mail. Send an email with the PDF document attached to uvic-imp-unacara@uvic.cat for single-sided printing or to uvic-imp-doblecara@uvic.cat for double-sided printing.
It goes to the queue after you have sent it. You have 24 hours to pick it up from any of the printers on the UVic campus. See the “”Quick guide to the multifunction device” to enable printing.
To set up the printers on your computer, you need to be connected to the University’s Eduroam wi-fi network (find out how to do this) and your operating system needs to be Windows or Mac.
Setting up the printers on Windows computers
1. Open a folder and type \papercut.uvic.catuvic-imp-unacara in the address bar to set up single-sided printing, or \papercut.uvic.catuvic-imp-doblecara to set up double-sided printing.
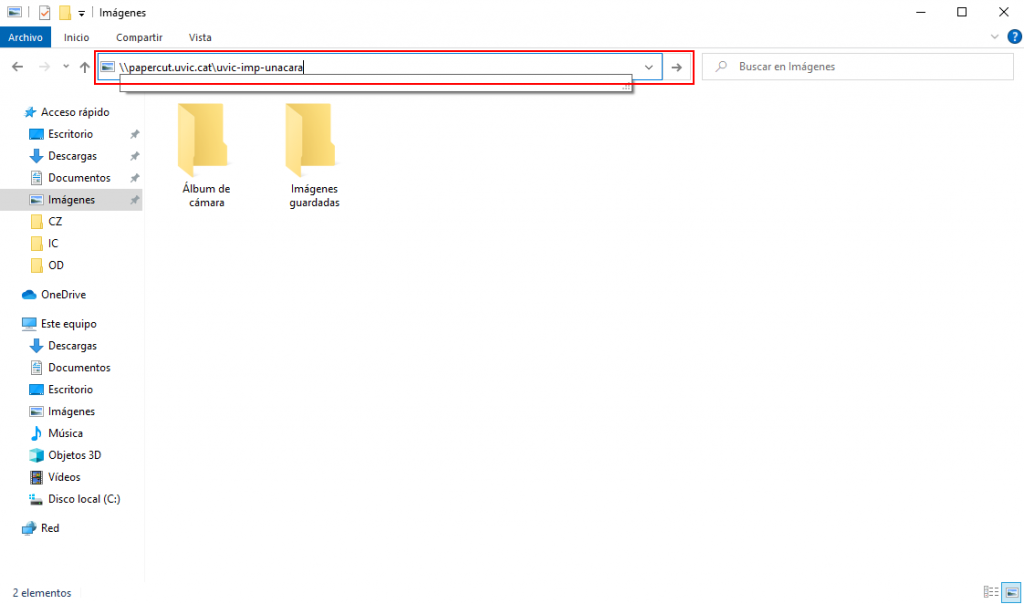
2. You will be asked for your Virtual Campus credentials. Enter these and the printer is set up.
3. Now when you want to print a document, you only need to open it and send it to the printer you want (single-sided or double-sided).
Remember that you can print any document from your computer only when you are connected to the UVic Eduroam wi-fi and you have to pick it up from any printer on the UVic campus within 24 hours. See the “Quick guide to the multifunction device” to enable printing.
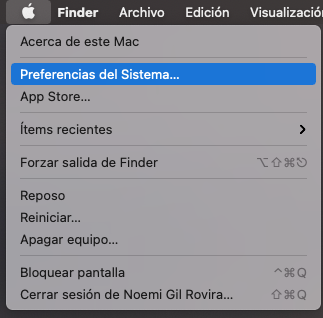
Setting up the printers on Mac computers
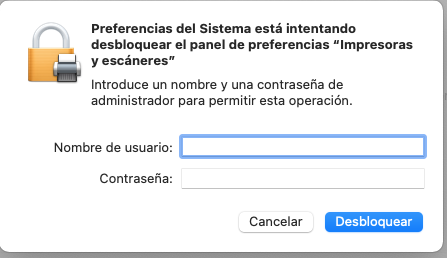
1. Open System Preferences and choose Printers and Scanners
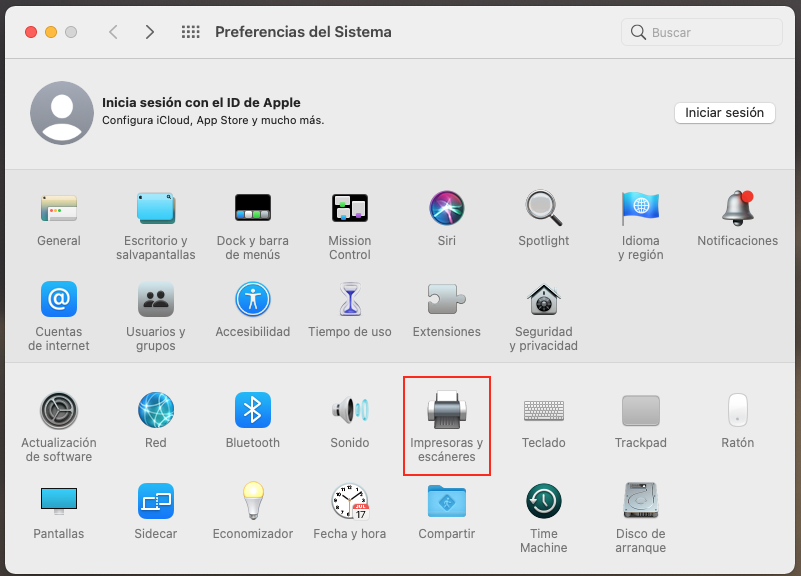
2. If you see the padlock, click on it and enter your device credentials. If not, you can go directly to step 3

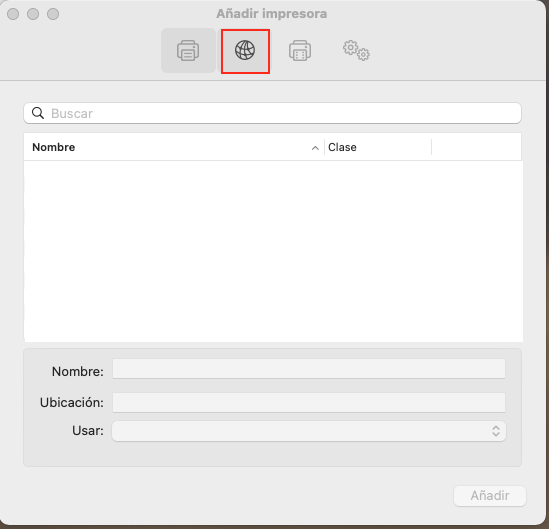
3. Click on the plus (+)

4. You will see these icons at the top, click on the one that is highlighted in the image (circle)
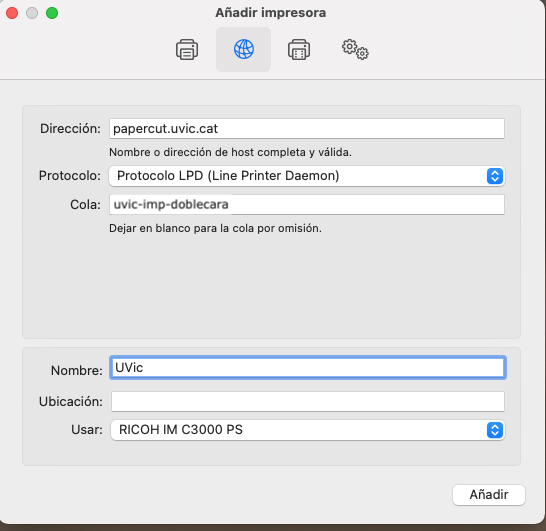
5. In the “Protocol” option choose “Protocolo LPD (Line Printer Daemon)”
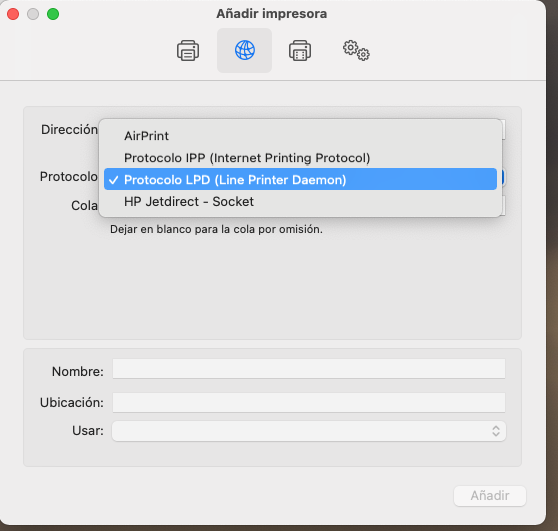
6. In “Address” type “papercut.uvic.cat” and in “Queue” you can choose between uvic-imp-doblecara (for double-sided printing) and uvic-imp-unacara (for single-sided printing)
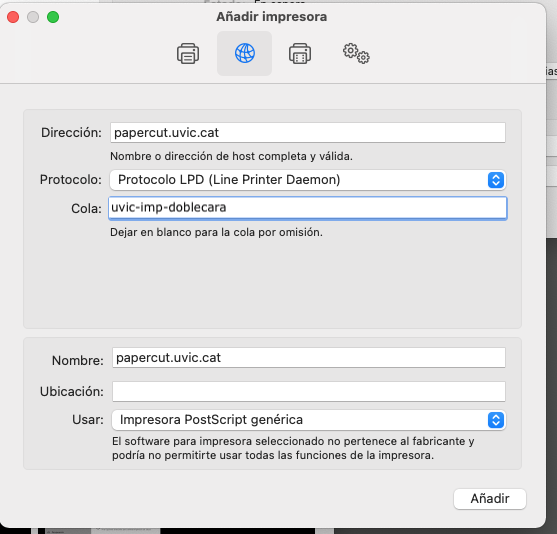
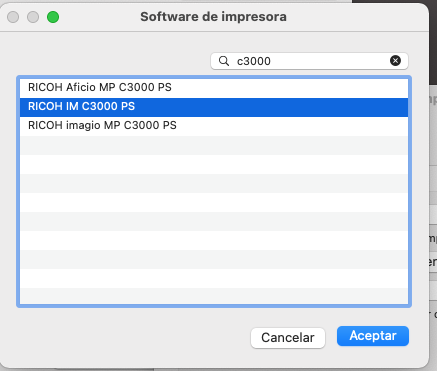
7. In the lower box under “Name” you can write the name you want to identify the printer. In the “Use” section, choose the “Select Software” option from the drop-down menu and select the “RICOH IM C3000 PS” option

8. The data must be like this, click on “Add” and you will have the printer on your computer.
Remember that you can print any document from your computer only when you are connected to the UVic Eduroam wi-fi and you have to pick it up from any printer on the UVic campus within 24 hours. See the “Quick guide to the multifunction device” to enable printing.
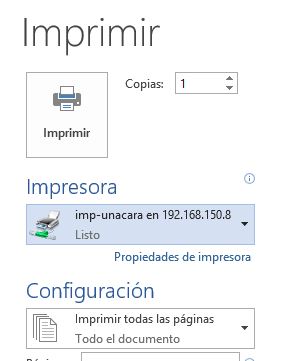
1. Access any UVic computer with your username and password.
2. Open the file you want to print and click Print.
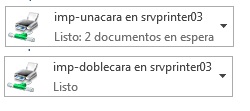
3. Select the printer: uvic-imp-unacara on srvprinter03 if you want to print on one side, or uvic-imp-doblecara on srvprinter03 if you want to print on both sides.
It goes to the queue after you have sent it. You have 24 hours to pick it up from any of the printers on the UVic campus. See the “Quick guide to the multifunction device” to enable printing.
When you register, the University of Vic-Central University of Catalonia gives you an initial balance of 30 €, which is increased by 3.75 € every month. 0.03 € will be deducted from your credit for each printing job. Please note that the balance does not accumulate from one course to another and is not refunded if it is not fully spent at the end of the course.
If you run out of the credit that the University gives you when you register, you can wait for the monthly top-up or buy 5 € of credit with a credit/debit card through the Virtual Campus or the Printing portal. This is the route you have to follow:
Main page > Procedures > Request for print balance increase
Once you enter the request page you will choose between a balance increase of 5,00€ or 10,00€ and after confirming you will be asked for the bank card details to make the payment. Once the payment has been made the print balance will be updated automatically.
The Printing portal is a space where you can check your printing account: printing record, credit available, ID number, etc.
-
- Access the Printing portal . Select “Change details”

The current number is the identifier for accessing the printers. If you want to make a change, click on “Generate number”.
-
- Access the Printing portal. You will see a summary of the state of your account upon entering

-
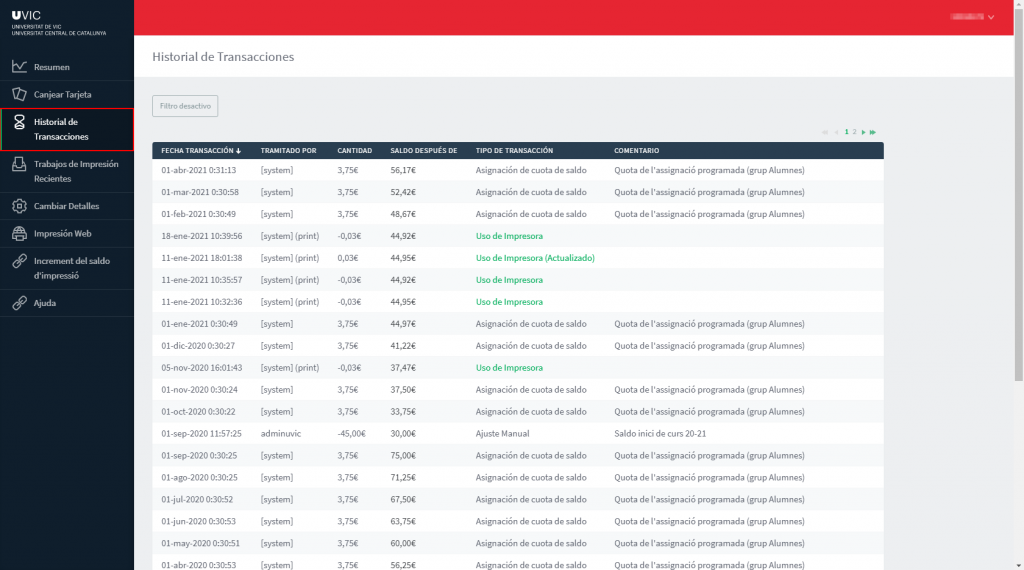
- Click on “Transaction history” to view the print quota
-
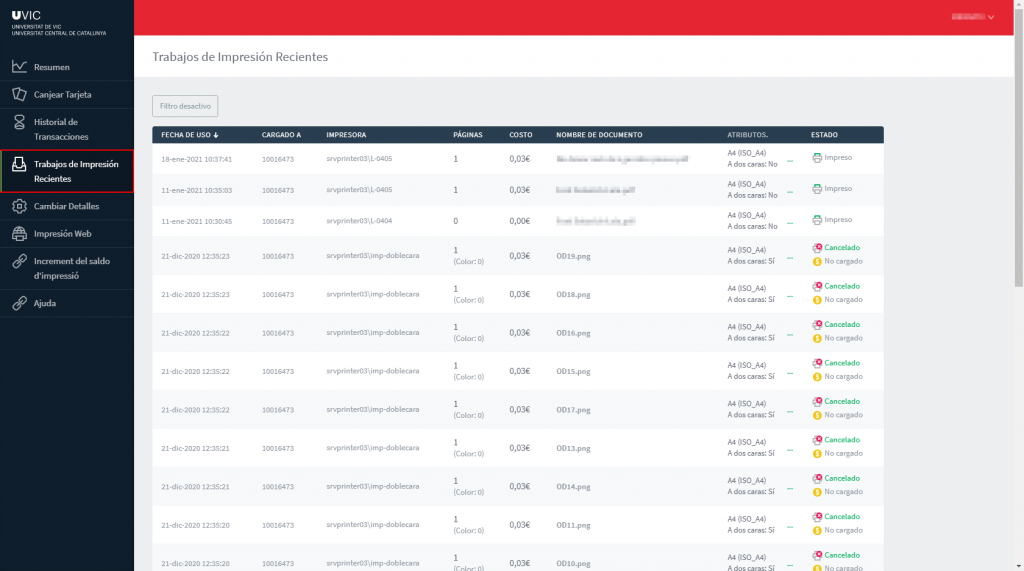
- Click on “Recent print jobs” to see a summary of print jobs
To access the multifunction device you can use any of these four options:
- User and password: UVic e-mail + virtual campus password
- User and password: NIUV + virtual campus password
- ID: PIN or printing portal identifier
- Linking your phone: using the App “Mobile Badge BLE NFC”
- Miramarges Campus
- Building B: Floor 1, next to the Computer service
- Building B: Bar area
- Building C: Floor -2, next to DS203
- Building D: Floor -2, Study classroom
- Building F: Floor 3, next to the lift
- Torre dels Frares
- Bar Area
- Library
- Floor 0 (toilets area)
- Masia de la Torre dels Frares
- Receptions
- Sports area
- Receptions
- La Seu de Granollers
- Can Muntanyola